

Homebrew has marked the LibreWolf cask as deprecated and plans to stop serving it on September 1 2026. The deprecation is tied to Apple’s requirement that macOS‑distributed binaries be signed (notarised) with a paid Apple‑Developer certificate; LibreWolf chooses not to obtain that license, so Homebrew can no longer host the unsigned app under its normal policies.
Homebrew prints:
Warning: librewolf has been deprecated!when you run brew install librewolf.
The deprecation is because the binary is unsigned, and Homebrew now enforces the “signed‑only” rule for macOS casks.
The cask will be disabled on 2026‑09‑01. The JSON for the cask explicitly marks it as deprecated with the reason “unsigned”. Homebrew staff confirmed the policy change is permanent unless the project provides a signed build.
Users report the same warning and note that the only workaround is to install via a custom tap or use brew install librewolf --no‑quarantine while the flag exists. Once the deprecation date passes, the cask will disappear from the core taps.
Why Homebrew is doing this
- Apple notarisation policy – Starting with macOS 12 (Monterey) and reinforced in later releases, Homebrew’s policy states that any macOS cask distributed through the official taps must be signed and notarised. Unsigned apps trigger Gatekeeper warnings for users and can be blocked outright.
- Security hygiene – Signed binaries give users confidence that the code hasn’t been tampered with after the developer released it. Homebrew wants to avoid distributing software that could be a vector for supply‑chain attacks.
- Cost barrier – Obtaining an Apple Developer Program membership costs $99 USD per year. LibreWolf’s community prefers to stay completely free/open‑source, so they have opted not to purchase that license.
Because LibreWolf refuses to pay for a developer account, Homebrew cannot continue to host the cask under its “official” taps.
Why do I see “LibreWolf wants to connect to cds.apple.com”?
If checking DNS records or using Little Snitch you may see the notification:
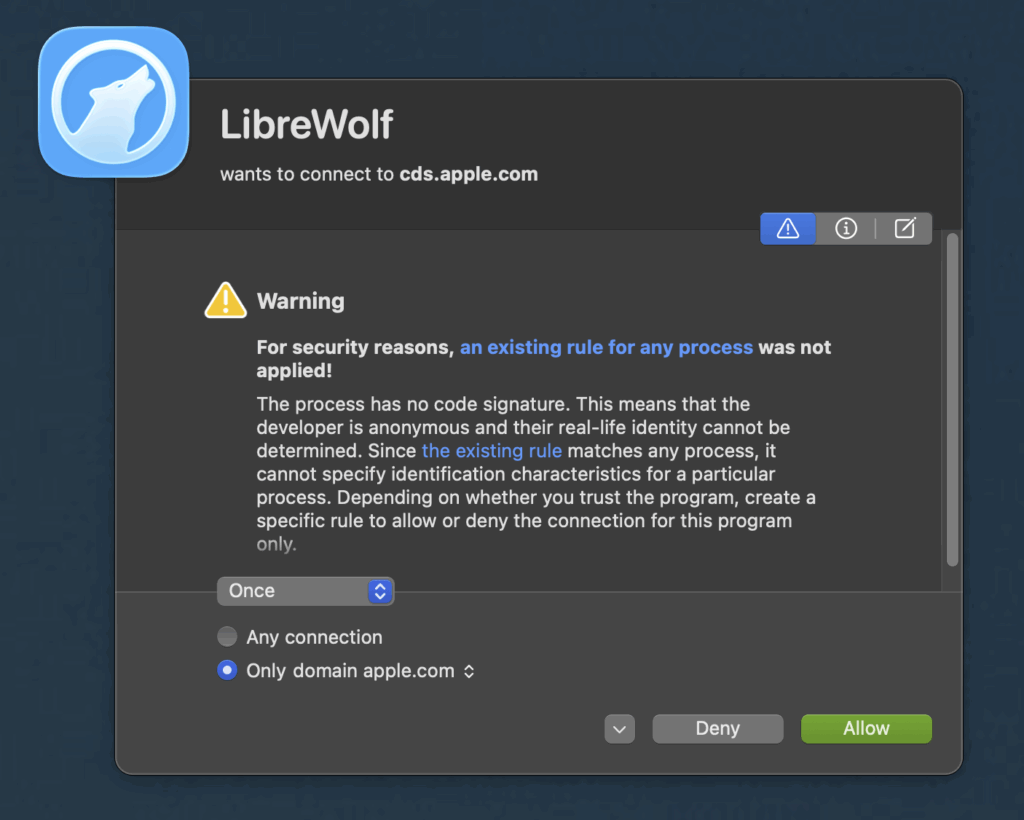
LibreWolf’s attempts to reach cds.apple.com isn’t a bug – it’s the browser’s macOS‑specific “notarization” fallback. Because LibreWolf isn’t signed with a paid Apple Developer certificate, macOS treats the app as unsigned and triggers its built‑in security mechanisms. Those mechanisms contact Apple’s content‑delivery network (e.g., appleid.cdn‑apple.com and cds.apple.com) to perform certificate checks, fetch revocation lists, or retrieve quarantine metadata taonaw.com. In short, the connection is part of macOS trying to verify the app’s safety rather than LibreWolf itself reaching out to Apple services for any functional purpose.
What this means for you being privacy & security focused
- Network visibility – Seeing these requests in DNS logs is expected on macOS. They’re typically short‑lived TLS handshakes for OCSP/CRL checks.
- Blocking considerations – If you block
*.apple.comyou’ll likely break the OS‑level verification flow, causing LibreWolf (or any unsigned app) to fail to launch or be repeatedly flagged as unsafe. - Mitigation options:
- Notarise the binary – Build LibreWolf yourself and sign it with your own Apple Developer ID, then notarise it. That eliminates the need for macOS to query Apple’s CDN.
- Use a sandboxed container – Run LibreWolf inside a VM or container where you can safely intercept and log the Apple‑related traffic without affecting the host OS.
- Accept the verification – Allow the occasional Apple‑CDN request; it’s a standard part of macOS’s gatekeeper process for unsigned software.
If you need deeper packet captures or want to confirm exactly which endpoints are contacted, tools like Wireshark or Zeek can filter for apple.com domains while LibreWolf is active. This will give you a precise view of the request types (TLS handshakes, OCSP, etc.) and help you decide whether any further hardening is required.
What you can do as a security‑focused user
| Option | How to implement | Pros | Cons |
|---|---|---|---|
Continue using Homebrew with --no-quarantine | brew reinstall librewolf --no-quarantine (or brew install librewolf --no-quarantine if you haven’t installed yet). | Keeps the convenience of Homebrew updates while bypassing Gatekeeper’s quarantine flag. | This flag may be removed in a future Homebrew release; you’ll lose the ability to auto‑update once the cask disappears. |
| Create or use a personal tap | Fork the LibreWolf cask into your own GitHub repo, then brew tap yourname/librewolf && brew install librewolf. You can also add --no-quarantine in the tap’s formula. | Gives you full control; you can keep the cask alive indefinitely. | You must maintain the tap yourself (updates, checksum changes). |
| Switch to manual installation | Download the .dmg or AppImage from the official LibreWolf site, verify the PGP signature (if provided), and place the app in /Applications. | No reliance on Homebrew; you can apply your own verification steps. | Loses the automatic update convenience; you must track new releases manually. |
| Build LibreWolf from source and sign it yourself | Clone the LibreWolf repo, compile, then sign the binary with your own Apple Developer ID (if you have one) or with an ad‑hoc signature (codesign -s -). | Guarantees you control the entire build chain; you can embed your own security policies. | Requires a development environment and familiarity with macOS signing tools. |
| Wait for a community‑maintained signed build | Keep an eye on LibreWolf’s issue tracker; sometimes volunteers create a signed “cask” hosted on a separate tap. | Might eventually give you a signed binary without paying for a dev license. | No guarantee such a build will ever appear. |
Practical steps you can take right now
- Check your current Homebrew status
brew info librewolf
You’ll see a line like Deprecated: true (disabled on 2026-09-01).
- If you still want Homebrew updates until the cutoff
brew reinstall librewolf --no-quarantineNote: Homebrew may warn that --no-quarantine could be removed in a future version; keep an eye on release notes.
- Set up a personal tap (optional)
git clone https://github.com/yourname/homebrew-librewolf.git
cd homebrew-librewolf
# copy the existing cask definition from Homebrew’s core repo,
# edit the `url`, `sha256`, and add `caveats` if needed.
brew tap yourname/librewolf
brew install librewolf- Verify the binary yourself (good practice for any unsigned app)
shasum -a 256 /Applications/LibreWolf.app/Contents/MacOS/LibreWolf
# compare with the checksum published on the LibreWolf download page- Consider building from source if you need absolute assurance that no third‑party code is introduced. The LibreWolf repo includes detailed build instructions for macOS.
Gatekeeper is the security feature that checks apps for a valid Apple signature (notarisation)
On macOS, Gatekeeper is the security feature that checks apps for a valid Apple signature (notarization) before allowing them to run. You can adjust its behavior or disable it entirely via the System Settings UI or the command line.
1. Using System Settings (GUI)
| macOS Version | Path |
|---|---|
| Ventura 13 – Sonoma 14 | System Settings → Privacy & Security → scroll down to Security → Allow apps downloaded from. Here you can select App Store, App Store and identified developers, or Anywhere (the “Anywhere” option is hidden by default; see the CLI method below to expose it). |
| Monterey 12 and earlier | System Preferences → Security & Privacy → General tab → Allow apps downloaded from. The same three choices appear. |
Tip: After you change the setting, you may need to click the lock icon in the lower‑left corner and authenticate with an admin password.
2. Using the Terminal (CLI)
The command‑line gives you finer control and lets you re‑expose the “Anywhere” option if you truly need it.
a. Check the current Gatekeeper status
spctl --statusTypical output: assessments enabled (Gatekeeper on) or assessments disabled (Gatekeeper off).
b. Turn Gatekeeper off (disable all assessments)
sudo spctl --master-disable- This re‑enables the “Anywhere” radio button in the GUI.
- All apps, regardless of signature, will be allowed to run.
c. Turn Gatekeeper back on (default behavior)
sudo spctl --master-enable- Restores the default “App Store and identified developers” setting.
d. Fine‑tune the policy (optional)
| Goal | Command |
|---|---|
| Allow only App Store apps | sudo spctl --set-assessment-mode -r strict |
| Allow App Store and identified developers (default) | sudo spctl --set-assessment-mode -r medium |
| Permit a specific app (bypass Gatekeeper for that binary) | sudo spctl --add --label "MyTrustedApp" /path/to/app |
| Remove a previously added exception | sudo spctl --remove --label "MyTrustedApp" |
3. Practical considerations for a security‑focused environment
- Least privilege – Rather than disabling Gatekeeper globally, whitelist only the binaries you trust (using
spctl --add). This keeps the broader protection intact. - Automation – If you manage many Macs (e.g., via MDM), you can push the desired Gatekeeper state with a configuration profile that sets
com.apple.syspolicy.kernel.extension-policyor runs a script with the abovespctlcommands. - Audit – Periodically run
spctl --listto see which apps have been explicitly allowed or denied. - Re‑enable promptly – After troubleshooting a specific app, remember to re‑enable Gatekeeper (
sudo spctl --master-enable) to restore the default security posture.
TL;DR Quick Commands
# Show current status
spctl --status

# Disable Gatekeeper (all apps allowed)
sudo spctl --master-disable   # adds “Anywhere” to UI

# Re‑enable Gatekeeper (default)
sudo spctl --master-enable